Pages

28 December 2013

pa i crosto

There is a saying in my village that goes: "Pa i crostó, l'esmorzar d'Altorricó." Which roughly translates as: "This is the traditional breakfast that people used to eat a long time ago, but not anymore." Well, things change over time. I doubt many people still continue the tradition of preparing pa i crostó for breakfast. I do sometimes. I really love to eat it, especially in the winter.
It is not really difficult to prepare, rather on the contrary, it is easy, but to tell you the truth the secret of a good pa i crostó preparation lies in the coordination of the steps. You want to eat it hot (if one of the ingredients, either the toast or the eggs gets cold, you will definitely not enjoy eating it.)
Since a picture is worth a million words, I took several pictures.

You need:


  • A frying pan
  • Olive oil
  • Salt
  • Garlic
  • A cup of boiling water
  • Two eggs (or alternatively anything else you like, eg. sausages)
  • A thick toast

Preparation:

Heed that the coordination of the steps is crucial! You have been warned :p
Cut a thick slice of bread, the thickest the better. You will have to pour the boiling water over the toast but you still want it to keep part of its consistence. If the toast is too thin, it will turn into a mash. Then toast it.
Heat the water until it starts to boil.
Meanwhile rub the garlic over the toast, on both sides. The flavour and the taste of the garlic cloves is the key to success.
Put the frying pan with oil to heat.
Pour the boiling water over the toast until it is soft, add salt and olive oil. Then, immediately fry the eggs. When they are ready put the eggs on top of the toast.
Do you want my special recommendation? Eat with a spoon ;)
Enjoy!


23 December 2013

Screenshot of the week 7

A few days ago I wrote a tutorial on how to configure weechat's relay plugin through a single port for all servers. I published it on my phlog, so I'm not unnecessarily going to repeat the information here. The link is here in case you are interested: (Warning: gopher link!)
gopher://sdf-eu.org:70/1/users/chals/phlog/2013/./12-15-13
Since the relay is working so fine, I decided to take a screenshot of the weechat instance running 24/7 with the configured relay running in a remote server and the other one of my local instance running in my raspi.
Just in case somebody is wondering why I run two instances of the same program both locally and remotely, the answer is plain simple. In my local instance I can configure and use as many plugins and scripts as I like whereas things are not so easy on the remote server. For example the aspell plugin which is really handy when typing fast or the buffersscript, just to name a few.


18 December 2013

pharc v.3.0 released

I have been procrastinating a bit about publishing version 3.0 because I wanted to do two things:
1.- Add functionality to choose the year of the archive, this would only be useful for people who are new to pharc but still, it would be a nice feature.
2.- Rewrite it in python, but unfortunately I'm still not proficient enough with python to do it (even though this is a simple script).
These things will have to wait for a later release someday :)
My initial idea was to publish one new release each year, i.e pharc1 saw the light in 2011, pharc2 in 2012, pharc3 in 2013 and so on and so forth, but to tell you the truth, gopher stuff is rather stagnant so I do not anticipate to see many changes in how things work form now on.
Anyway, the changelog for v.3.0 is:
 - Added option -a to specify current year of archive (redundant).

 - Added -v (version information option).

 - Added -h (help menu).

 - Added -y (year of the archive).

 - Help function (usage).

 - Improve coding style.

 - Leave a backup of gophermap > gophermap~ (in case things break).

 - Test before echoing "You're done now. Thanks for using pharc."
You can find all pharc versions here (gopher link):
gopher://sdf-eu.org:70/1/users/chals/downloads
There is also a .deb package available here:
And as usual, the git repository is hosted at gitorious:
pharc git repo

The wiki is located here:

17 December 2013

Screenshot of the week 6


This is a tiny screenshot of a corner of my sid desktop. It was taken with scrot -s to select a region.
The story behind these "weird" icons is as follows:
  1. never use desktop icons. I love clean desktops and I get rid of any default icons. So this exception is a remarkable thing.
  2. These icons are a quick, dirty hack to halt and/or reboot the laptop. The reason being that the logout button does not allow me to perform those actions. I haven't been able to fix it so I added those icons which execute/sbin/halt and /sbin/reboot respectively.
In order to create those icons I browsed to the Desktop directory with pcmanfm then right click on the mouse and select Create New/Shortcut.


06 December 2013

weechat2

It has been a really, really long time since I used weechat for the last time but now I'm back and I don't anticipate to look back again.
My first irc attempt was with a web-based client (possibly mibbit) Then, when I started irc'ing seriously I started using irssi (inside screen). After that, a friend of mine recommended me weechat (inside tmux). I liked both combinations, but I soon went back to the good old duo irssi and screen. Why? Well, I really made an intensive use of the irssi proxy plugin. With it I could connect to the same core from different clients and different locations. It was very handy for me. (I know that weechat also has a relay plugin but I never bothered configuring it)
Now I really do not use the proxy. I only use one computer at a time so connecting via sshto the machine running my irc client 24/7 is more than enough for me at the moment. But then, the bad news, the machine running my irc client (odin at sdfeu.org) crashed and we were left without the service for an unspecified amount of time.
So I put plan B into practice. Bounce using my raspi, which already hosts my gopher server. In my raspi I only had tmux and weechat already configured, so I didn't spend any time installing and configuring other programs. I directly launched the already existing ones. And wow! what a difference. Now that I'm a bit more into the irc world. I can take advantage of the plugins and scripts that allow you to achieve what you want/need.
One big difference between weechat and irssi is that weechat's scripts and plugins seem to be more integrated (ie. work better) than in irssi. Apart from the fact that weechat has a lot of default options that you can only achieve in irssi installing plugins.
The best plugin, so far, is the aspell one. Once activated, it highlights in red your misspelt words. This way you avoid posting a lot of typos.
The best scripts, so far, are: the buffers.pl, urlbar.py, urlgrab.py, cmus.py, weeget.py, iset.pl and isgd.pl (a url shortening service utility) but there are also a lot of fun and interesting ones, like for example , the games weetris.pl or mastermind.pl. Some other scripts that allow you to manipulate text are, among many others, leet.py, upside_down.py or prism.py
I have played with some others and I will spend the rest of the weekend trying new ones, like for example the beep.pl or launcher.pl ones.

23 November 2013

Screenshot of the week 5

This is how my sid desktop looks like after I installed this nice wallpaper of the interior of a toyota celica.
Now while I'm working at the computer I can imagine that I'm driving my car, oh so lovely :p

01 November 2013

More celica

I took this picture this morning. (Borat would say: "Wawaweewaa! I like")


Greenhouse

I have been working in the garden for a couple of days building a small and affordable greenhouse for less than 100€. It is not finished yet but you can get an idea of how it will look like once it is done.


31 October 2013

Celica photo shoot

This afternoon we made a small photo shoot of the celica. I hope you like it. Thanks to Jesus for the cool pics.


24 October 2013

Celestial celica

I have been dreaming about this car ever since I was a teenager. Well, twenty years ago the model was really different, the headlights were round but the sports look and feel were more or less the same.

To tell you the truth, I used to dream about the 1990's model, it is the one that stole my heart. They are not very difficult to find on the net but to be sincere, that model is a relatively old car, not yet a classic, I hope you see the difference and get what I mean.

I already own a toyota and I'm very happy with it. It is the most reliable car I've ever had so far but it is simply not a celica ;)

When toyota stopped producing celicas in 2005 I thought that I would never be able to get one. But guess what, I went to a car fair last weekend (I usually go to all of them) and found it. This happens to be the 2005 model and thus the very last one in production.

Well, I couldn't resist and bought it, so now I have a small collection of toyotas at home, which is cool. I hope to get a discount in my next acquisition for being a faithful customer ;)

Here you are a couple of pictures I took at the fair. I'll upload more photos soon, I want to find a lovely background to show off how knockout my celica looks. Absolutely stunning, isn't it?


12 October 2013

Here comes the sun.

I know it took a while until I could place the solar panels in the right location but I've been busy all summer long.
I bought four solar panels at the end of July and they arrived at the beginning of August. First, I made a provisional installation to see if they worked correctly and they did, but they could not take advantage of direct sunlight all day long.
I started building the frame to hold eight big solar panels and I did all the work to put it on the roof of the house. Today I have finally "uploaded" the four initial solar panels and connected the cables. They have been producing good electricity all the afternoon. "Good" as in both "environmental friendly" and " for free", or "gratis".
If the results are good, I'm gonna get four more for Christmas. They are really cheap now so it is the right time to do it.
Here are some pics:


30 September 2013

11 August 2013

Always the sun

I'm double enjoying this nice sunny weather ;)


01 June 2013

Debian GNU/Hurd successfully installed

I have successfully installed the 2013 version of the debian GNU/Hurd port. So far it is only inside a virtual machine but I may install it in a partition once I get more used to how it works.
A default installation does not include a lot of software. That's where the power of debian comes in handy. You know the drill apt-get install...


(Credits go to MrFrood for finding the gnu ascii art below, and showing me how to include it.)
  ,           , 
 /             \ 
((__-^^-,-^^-__)) 
 `-_---' `---_-' 
  `--|o` 'o|--' 
     \  `  / 
      ): :( 
      :o_o: 
       "-" 

28 May 2013

Debian GNU/Hurd


The Debian GNU/Hurd team announced the release of Debian GNU/Hurd 2013.
I downloaded the image last night. I need to remember to login as root without a password. This is a screenshot of the OS in action.


11 May 2013

Reality check

Yes, high time to make a reality check :)

05 May 2013

debian 7.0 wheezy released

This weekend the debian team has released its 7.0 version codenamed wheezy (Now the new testing suite is jessie). It was officially published yesterday May 4th, 2013 but still today the debian-www, debian-publicity teams among others are still working at full speed finishing many remaining details.
Only two things to mention about this release:
First, the bug hunt continues, now with more strength, as new bugs will arise after the release.
Second, wheezy comes with 37,000 software packages whereas squeeze had 29,000. Impressive!!!
Congratulations to everybody who made it possible. Thanks!!!

22 April 2013

Scrobbling to libre.fm as seen by elinks


In my .bashrc you can find (among many others):
 # Export browser && homepage

 export BROWSER="elinks"
 export WWW_HOME="http://chalsattack.com"
Elinks is the heck of a console browser for many reasons: It is a full featured browser with few limitations, it has mouse support for following links and scrolling up and down and it has tabs like so many other graphical counterparts. And the best thing of it all is that it is so easy to use them that once you get used to them you just cannot do without.
t opens a new tab.
<> move between tabs.
c closes tabs.
Ctrl + r reloads a tab/page.
Nevertheless I must admit that I also use w3m on the tty if I need to see the pics andlynx for browsing gopherspace. One curious thing is that elinks does not support the gopher protocol out of the box. You have to compile it with gopher support in case you want to take advantage of it, but if you type a gopher url in elinks it automatically opens a lynx instance to display the gopher hole. Awesome :)
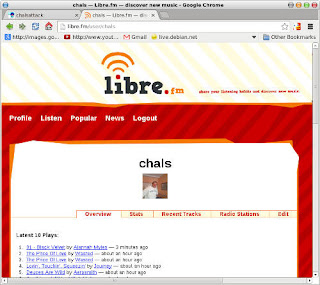
In this screenshot you can see my libre.fm page while I'm scrobbling with cmus as seen by elinks.


21 April 2013

Screenshot of the week 4


This is an screenshot of what my dual head desktop looks like on a typical weekend. (I must admit that it looks very much the same in my free time on a regular day).
You can see two small terminal emulators on the left. The one on top is in charge of taking the screenshot with scrot but before that it was running several of my aliases and functions. Specificallytt (or Terminal Title, alias tt='xfce4-terminal --geometry 90x55 -T $1') and aptget (alias aptget='apt-get update && apt-get --yes upgrade && apt-get clean')
The other small terminal is running cmus all day long in a tmux session and scrobbling to http://libre.fm
On the other terminal on the left side I am fixing fuzzy stings in a translation inside a git repository.
Now on the right side of the screen (the other head so to speak) there is irssi running in a screen session in my shell account at http://sdfeu.org
And last but not least, there is my homepage in the impressive lynx web browser. Here I'm lying a bit to you. I usually use elinks on the cli but it didn't look so cute for a screenshot. You can see the terminal title reads "elinks" but it is in fact "lynx".


17 April 2013

cmus

Throughout my relatively short (or long, it's hard to tell) experience with gnu/linux systems I have used a variety of console music players. If I remember correctly the first one I used, years ago, was music123, then mocmplayer...I had recently settled with nvlc because I found it very handy to start it on an ssh/tmux session to be able to control it from any corner of my network. See post on nvlc for details.
But now I have definitely and absolutely switched to cmus the single best console music player I know so far. Why?
Well, to begin with, I can still use it inside tmux or screen and use ssh to control it over the local network.


Secondly I can scrobble with it to http://libre.fm so that the songs I listen to are immediately published online.


cmus does not scrobble out of the box by itself. In order to make it scrobble I downloaded a script named last-cmus.py (linked from cmus official site) and modified it a bit. The process is pretty simple. Download the script to $HOME/.cmus, make it executable, edit username, password and url to use "http://turtle.libre.fm/". Finally, in cmus interface set status_display_program=/home/chals/.cmus/last-cmus.py


And last but not least. I can know which song I'm listening to at any time since it is echoed by conky.


Again, cmus does not directly communicate with conky. I had to download another script I found on the internet to make it work. Then I edited my .conkyrc adding this:
 ${color #ffcb48}Now Playing ${hr 1}

 ${color lightgrey}
 ${execi 2 /home/chals/Dropbox/bin/cmux-conky}
Notice that this time in order to make this setting more portable inside my own network, I added the script to my Dropbox folder so that I can access it from all my machines.


Awesome, huh!

14 April 2013

Tomato 2013

First tomato plant of the year.


09 April 2013

Clean (script)


I really do not know if this can be achieved automatically in a different/more effective way. The reason why I wrote this simple script is that I wanted to clean certain directories in my filesystem. The idea started with /tmp but I decided to include other directories such as the Trash bin.
What the script does is: One after the other, it tests whether the directories are empty or not. If they are empty it does nothing. If they contain files the script removes them, including the dot files.
BUGS: The script has, at least, one bug. Since it is set -e it stops after the very last iteration if there are hidden files in /tmp which cannot be removed if you run the script by hand as normal user. That is why I put /tmp in the last place. When it stops, all the other files are already deleted so it does not really matter whether it stops or not.
Why do I use set -e? Because I think that the rm -rf command toghether with a * wildcard is way too dangerous to let it loose.
Why keeping a log file? Because I can :)
Why to log ${DIR} is empty? This way I can adjust cron/anacron timing. For example, if I run it weekly and after a week the ${DIR} is empty, I may prefer to run it after two weeks or so. Do you get the idea? ;)
Why does the log file not include a list of all the deleted files? Who cares about the contents of Trash or tmp anyway? Especially after they have already been deleted.
Why not write a log function instead of redirecting the output to a log file?Because I'm too lazy to do that? Now seriously, the idea was in mind but the script is too simple to do that. Perhaps one day it will get better and grow bigger, and I do finally write that function then. (Note: That is not likely going to happen).
What is the best way to use this script? To tell you the truth, the best way to use this script is simply NOT using it. I mean that it really is very dangerous to remove files like that, hence the 'Big Fat Warning' on the header of the script. But still, if you want to give it a try, first read it, understand what the script does and adapt it to your needs.
Then, I recommend you add the script to, say, /etc/cron.monthly so that it is run by your system on a monthly basis.
Here is the script:
 #!/bin/sh

 set -e

 # Script to clean directories. The ls -A means that it does not list . & ..
 #
 # BIG FAT WARNING: rm -rf is potentially dangerous. Use this at your own risk!

 # Directories to clean.

 TRASH="/home/chals/.local/share/Trash/files" # Trash in Xfce
 DIR_TO_CLEAN1="/home/chals/tmp"
 DIR_TO_CLEAN2="/tmp"

 # Where to write the log file.

 LOG_FILE="/home/chals/clean.log"

 # Let's do it!

 for DIR in ${TRASH} ${DIR_TO_CLEAN1} ${DIR_TO_CLEAN2}
     do
         if [ "$(ls -A ${DIR})" ]
             then
                 rm -rf ${DIR}/* && rm -rf ${DIR}/.??* > /dev/null 2>&1 # Remove dot files too.
                 echo "$(date) Cleaning ${DIR} :) " >> ${LOG_FILE} 
             else
                 echo "$(date) Nothing to be done, ${DIR} is empty :( " >> ${LOG_FILE}
         fi
     done

07 April 2013

Potato

The first potato plant of the year in the kitchen garden.


Mona 2013


On Easter Monday we celebrate Mona's day. The tradition is going out to the countryside and have a picnic with our families and/or friends.

We have lunch and eat an special cake called The mona, hence the name of the celebration. The cakes often include the traditional chocolate eggs and these beautiful coloured feathers.

This year, we did go out to the country but it was really windy and we had to eat inside the cottage by the fireplace but on the bright side we had two cakes this year, one for each nephew


27 January 2013

Carrying debian in the keyring

I always carry a debian-live system in my keyring, it is an image (built by myself using a git repository) that I installed in a USB pendrive.


The device has three partitions. The first one contains the debian-live system itself, the second one is used for persistence and the third one is an extra fat16-formatted partition to copy and move files around easily. Here is the layout:


It is really handy to to be able to carry your operating system with you everywhere you go. You can boot it on almost any machine you have access to, saving your data in the pendrive. It is also a great tool to test hardware before performing an installation (the image includes an installer).

Using a raspi as a switch


Everybody is asking me why the heck I got a raspi. I proudly show it to all my family and friends and they all say:
 "What's this? What's this for?"
(I do not have the energy to explain them what a gopher server is, and why everbody should have, at least, one.)
I imagine that everyone has a different use for their raspis. I am having so much fun playing with it since I received it that I should write a post every single day. But unfortunately I do not have the time to do it :-(
Today I have yet found a new use for it, perhaps one of the best uses I could think of, even though I didn't have that idea in mind when I bought it.
I have a network server that I only use occasionally. I turn it on when I get home if I need it, but I always turn it off at night. One of the reasons to get my raspi was the possibility of having a machine connected 24/7 and also reachable through the internet, for example, using a smart phone.
Today, I was away from home with my netbook (eeepc 701) and I needed to start a build on my server. I thought it would be excellent if I could start the build before getting home and this way the first test would be done by the time I arrived home. Well, suddenly I got the idea:
I often turn the server on using 'wakeonlan', I have got several aliases to mount devices on my network and do other similar things. So using ssh from my eeepc I logged on to my shell account at sdf-eu, from there I connected to my raspi and installed the wakeonlan package (I didn't have it installed there yet) but I had my.shell_aliases in my $HOME. From there I turned on the server and opened a shell to start the build. When I got home the first build had failed and stopped, but it saved me a lot of time because when I arrived I could start another build right away.
I know that the idea is not the state of the art. Many IT guys do most of their work jumping from one server into the other all day long but I'm happy to have come up with such a nice trick: Using the raspi to turn on and off other machines in my network remotely. From now on my raspi will be one server to rule them all.

26 January 2013

Here comes the squid


I have added a new machine to my personal collection. Its hostname is squid following my naming convention. See my Profile for more information.
It has a 64-bit processor (athlon), 2GB of ram and two hard disks. It is a little bit old but it is really fast. Today I installed debian wheezy with the b4 installer. Everything went fine and smoothly.


Welcome to my network, squid :-p

01 January 2013

curlftpfs


Having a raspi on the network is a fantastic thing. It has so many possibilities that it seems endless. One of its constraints, however, is that it has not got a lot of available space. Well, it can have as much space as you can afford but big sd memory cards are expensive (or at least more expensive than the raspi itself) An sd card of 32 GB costs 39€, way more than the raspi itself.
Solutions:
  1. Attach a pendrive (or several of them using a hub) to have a bit more spacehmm similar situation. This might be expensive and even ugly.
  2. Mount a network drive as if it were a local storage device.
I chose option 2. I normally use sshfs to mount drives on my network or even remotely. I have an ftp-only drive that cannot be mounted using ssh. So I had to install curlftpfs. It is extremely easy to use.
  1. Make sure your user belongs to the fuse group. If not:
    $ sudo adduser < user > fuse
  2. Then make a mount point.
    $ mkdir -p ${HOME}/nas
  3. Mount it.
    $ curlftpfs -o allow_other < user >:< password >@192.168.2.30 ${HOME}/nas
Nice huh?
To unmount it:
$ fusermount -u ${HOME}/nas
You can now either add the mount to fstab to make it permanent (not really necessary in my case since the raspi is up 24/7) or create an alias.
alias nasmount='curlftpfs -o allow_other < user >:< password >@192.168.2.30 $HOME/nas'
alias nasumount='fusermount -u ${HOME}/nas'
Now the best part of it. I mount the ftp server in my raspi but I also mount my raspi over ssh in my laptop so in the end I have my ftp server mounted in my laptop out of the box. Neat!!!